THE MEASURE OF A MOMENT

Wednesday, December 28, 2011

An Introduction To Project Life - 2012

Over the last few posts I have mentioned Project Life here and there and some of you may be wondering what in the world I am talking about OR some of you may know exactly what it is and even be seasoned "Project Lifer's".  Whatever your familiarity is with Project Life, this post is all about the "nuts and bolts" of Project Life - what is is, how it works, how it will become a part of my life, etc.

Project Life is a scrap booking concept that was created by Becky Higgins.  It simplifies how you document and preserve memories.  Direct from Becky's blog:  "With this easier-than-ever scrapbooking system, simply pair your photos and journaling with pre-designed title cards and journaling cards.  Your photos, these cards, and even your memorabilia slip into the Photo Pocket Pages and that's it.  The result is a stylish masterpiece that represents your life or whatever occasion you choose to record.  With Project Life's beautifully simple format, deciding what supplies to use or how to design layouts becomes obsolete, leaving you more time to experience life."

Here is a video by Becky Higgins (direct from Becky's blog) that offers a great introduction to Project Life:


There is a wealth of information on Becky Higgins site about this project.  I can literally spend hours looking at her site.  Here is a link to her site:
http://beckyhiggins.com/

When I first read about this concept it immediately appealed to me.  I used to be much more involved in my paper scrapping (before discovering digital) and I really miss my paper scrapping sometimes.  I just like the idea of putting my hands on things and creating with them.  I had also been working for a few months on being a better journaler and making sure I was recording our memories.  All of the little details along with the big ones.  I knew right away that this was exactly what I didn't know I was looking for!

One of the awesome things too about Becky Higgins Project Life is that for 2012 she has introduced a digital version of the products!  You can create your albums through Shutterfly where all you need to do is drag and drop your photos into their pre-designed pages.  But, you still have the ability to make the album ALL YOU as the elements on the pages are able to be moved and rearranged.  You also have the option to buy the digital kits and templates from Jessica Sprague for creating your album completely from scratch!  You can find the digital information about Project Life here on Becky's blog:
http://beckyhiggins.com/products/digital-project-life.php

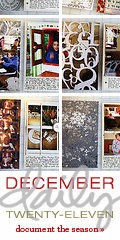
I have decided to go with the paper version for the bulk of Project Live and here are the products that I have purchased from Becky Higgins to start documenting our lives:

Project Life Binder - Clementine Edition

Project Life Core Kit - Clementine Edition

Project Life Cardstock - Clementine Edition

Photo Pocket Pages - Big Variety Pack 1

12 x 12 Page Protectors

Photo Pocket Pages - Design D

Of course, there will be LOTS of other great products that I add in along the way and I will be sure to keep you updated on what has been added to my stash.  You can make Project Life as creative and original as you wish.  It can be very simple or more involved and a bit more scrap heavy.  That is one of the great things that I love about it.  I will definitely be adding in lots of things along the way to make this project more "me".    

Next week I will have a post for you taking you through the set up of my "base" for my Project Life binder! 

Until then - I am off to spend some time with the family.  Alyssa is home for the holidays and this is her last visit before she leaves for her 4 year assignment in Hawaii in February so I am trying to suck up all the time I can with her.  Who can blame me for that, right?

From our family to yours:
Hugs!

Thursday, December 22, 2011

A Few Layouts

I just have a couple of layouts I want to share real quick today then it's back to visiting with my baby girl, Alyssa who is home from Tech School for the holidays!  I also still have to wrap Laddy's presents, make his stocking and clean my house before my Mom and Dad come!  LOL

I was one elated girl a few weeks ago when I got an email from Erin of Secret Stash Designs to be a guest creative team member for her for the months of December and January.  I had applied to her guest call but NEVER thought I had a shot at making the cut.  So, getting that email totally made my day!  Since then I have completed 3 layouts for her and I am telling you.....her kits literally scrap themselves.  All of her elements are so fantastic and I literally tried to use every one on this most recent layout:

Silly Nilly Value Bundle by Secret Stash

I also had the pleasure of working with a new collaboration by Studio Flergs and Litabells Designs.  I just love everything that both of these awesome girls do and when they got together it was fireworks!  Kay Miller also had a new set of her amazing Pieces of My Heart Templates coming out this week and I knew that they would be the perfect fit for this new collab.  Check out the result:

L'amour by Studio Flergs and Litabells Designs
Pieces of My Heart Templates 12 by Kay Miller

Hope you all have a fantastic day!  I will be back soon with my first Project Life post!!!  Hugs!

Wednesday, December 21, 2011

Journaling Your Life

How do you journal your life?  I have to admit that I have never been very good at keeping track of the little moments in my life.  Well, I don't know that I am even good at preserving the big moments either.  As I have gotten older and I see my children and grandchildren growing right before my eyes, the idea of preserving every minute has become more and more important to me.   

In June I became a part of the Log Your Memory challenge team and it kicked me into high gear to start journaling my everyday.  If you aren't familiar with Log Your Memory, it is a business that is dedicated to real life memory keeping.  You can find more information about Log Your Memory and their great memory preserving products here:
With the 2011 Memory Logbook, I started using the daily calendar to journal everyday.  I knew that I was going to be starting a 2012 Project Life so I wanted to start journaling to get myself in the habit of doing it everyday.  

As much as I like the fact that I have been pretty diligent about keeping up with my journaling, I have actually found that I hate the time consuming part of hand writing all about my day.  There are so many details that I want to remember but writing all of it out is just not something that I enjoy.  I thought that being able to type my memories into the computer would actually be more suitable to my needs.  

Introducing OhLife!  

I could not have been introduced to this at a better time.  It was just the answer I needed when I needed it.  OhLife is an private online journal.  It is super easy and FREE to sign up.  Each day an email is sent to you (you can alter the settings so that you can receive the email reminder daily, weekly or not at all) to prompt you to journal.  All you need to do is hit REPLY and start typing about your day.  Hit SEND and it is saved to your OhLife journal online.  


You can go into your OhLife account and edit any day you need to and you can even go back and journal past days.  I am currently working on going back and adding my hand written journal entries to my OhLife online journal.  Then I can recycle all the paper I have used over the last few months.  

Typing about my day online takes me nearly half the time that it did to hand write it all and I have now found that I am writing about so many little details that I was not before.  I can then look at my daily entries and pick and choose which details about my day I want to use in my Project Life and whatever I choose not to focus on is still preserved in my online journal for the future.

You can also export your journal entries so that they are backed up and saved or printed for more creative uses.  You could print out your days and cut and paste certain parts into your Project Life.  I know there are so many ways I am going to find over the course of the next year to utilize this resource.

If you are interested in joining me and trying out OhLife, just use this link (this is a special link that just gives me kudos for referring you - once you start using OhLife, if you refer just one person you then get free photo uploads to attach a photo each day to your journal entry.  I already have that but still like to refer through my special link.):

If you decide to use OhLife, I would love to hear what you think about it and for you to share your creative uses for it.  

I will be back in a few days with my first "official" Project Life post!  Woohoo!!!

Friday, December 16, 2011

A Few Layouts

Wow, I have seriously been a bad blogger!!!  I got so busy getting my design business off of the ground that I have neglected the personal side of me.  But, that is all about to change...because 

Project Life 2012 

begins soon!

I have received almost all of my goodies now.  Just look at me loving on my new crush.


I have a couple of big Project Life posts scheduled for the next week so I won't go any further with that right now.  I am super excited though and you will be seeing LOTS of this blog dedicated to my Project Life.  ;)

I do have a few layouts that I have recently done that I want to share with you.  I have not gotten to scrap like I like to in the past month but, I think I am catching back up now and will be able to get back into my routine of a few pages a week.

LOOK at this one!  I got not one, not two but THREE gallery standouts for this page in one day!  I got one from Me So Scrappy, Scrap Orchard and DST!  That has never happened to me before and I was soooo incredibly honored.  I knew I loved the page cuz well, it is my Laddy but had no idea it would be so loved by others!  Thank you all!

Make A Wish Value Bundle by Secret Stash
or get the products I used in my layout separately:
Make A Wish by Secret Stash
Make A Wish Stackers by Secret Stash
Winter Flavors: Candy Cane by Busy Bee Designs

Winter Wonderland by Kristin Aagard
Epic Grab Bag: Mish Mash Fall Stash by Queen of Hearts

Be Merry by Secret Stash
Be Merry Overlays by Secret Stash
Be Merry Bonus Alpha by Secret Stash (Facebook Freebie)
Beveled Cardstock by Secret Stash (Newsletter Freebie)
Rock My Holiday Socks by Queen of Hearts

Christmas Around The World by Pickleberrypop Designers
Hootinany by Jeanye Labaya Designs
Font: SMD Niki by Stolen Moments Designs

Well, I am off to work on my Project Life for the day.  I hope you all have a blessed weekend.
Hugs!! 


Friday, November 18, 2011

Tribute To Tyler

A few weeks ago, I came across the story of little Tyler Burdick, a beautiful 2 year old baby boy who was diagnosed with Infant Acute Lymphoblastic Leukemia at 4 months old. I typically do not handle stories of "real life" pain and tragedy very well especially when it involves a child. However, something about Tyler's sweet little face made his story irresistible to me. Through tears, I sat and read Tyler's complete story and I was moved beyond belief by it. Being a Mother myself and even more so given the fact that I have a grandson whom is just 15 months old, my heart ached for Tyler and his family.

Little baby Tyler earned his angel wings on November 2, 2011 just after I read his story. Just a few days later, I received an email from a Mary informing me that she was also so moved by Tyler's story that she asked a designer she creates for if she would be willing to organize a charity collaboration to help Tyler's family with their financial needs. I felt it was fate. I knew that I wanted to find some way to help this family and contribute a part of me forever to Tyler. I immediately emailed both Mary and the designer, Miss Mis Designs, that I would indeed be participating in this generous, thoughtful endeavor.  Misty (Miss Mis Designs) had an overwhelming response to this collaboration and it is my honor to share with you the result.


Tribute To Tyler

A $10 charity collab by 31 designers available at Funky Playground and Scrapable.

This kit is bursting at the seams, with the following:
[80] 12x12" patterned papers
[30] 12x12" solid colored papers
[138] elements
[37] Word Arts (2 also come in layered psd format)
[7] alphabets in individual png format only unless otherwise noted:
[1] lowercase, numbers and symbols (in full sheets only)
[3] lowercase, uppercase, numbers and symbols (2 also include full sheets)
[1] lowercase and numbers
[1] lowercase
[1] with uppercase, numbers and symbols
[3] 12x12" layout templates in psd, png and tif formats (one also includes sbcpage format)
[48] Photoshop Styles in asl format (6 also include .jpgs)
Here are a few more detailed images for you of this amazing collaboration:

A very special thank you to the following designers who gave their time unselfishly to this project:
This kit is a must have for your digital stash, containing elements and papers that would be great for many layouts and projects in your life. As well as, you would be helping a family as they begin their journey of healing and remembrance. All for just $10!

If you would like to read more about this beautiful baby boy and his family, you can visit their CaringBridge website here:  http://www.caringbridge.org/visit/tylerburdick

Friday, October 28, 2011

December Daily

Have you ever heard of Ali Edwards December Daily project?  Have you done one?  I set out to do it two years ago in December 2009 with the best of intentions.  I bought this album:
I even started gathering the contents of it that I was going to use.  I just never made it past the planning stage.

For nearly two years it has all just sat in a pile in my studio.  Well, I have gotten a wild hair again and I have promised myself and my family that I will do it this year!  I have a really cute idea planned for my cover but, I don't want to spoil the fun so I won't be posting how it turned out until after it's done (and let's hope it's presentable! lol)

In my album, I have plans for a few things already.  A few years ago we did a fun family project a day with activities such as making homemade Wassail, making Chocolate Covered Cheesecake slices on a stick (they looked like Xmas trees!), making Pecan Tassies and much more!

Here are a few layouts documenting our activities that year.


So, I plan to do that for all 31 days this December.  I am still looking for good ideas for activities though so if you have some I would love to hear them.
So far we have these planned:
Chocolate Covered Cheesecake
Watch Xmas movie as a family
Play a board game together
Pecan Tassies
Homemade Sugar Cookies
A trip to Starbucks
Drive to see Xmas Lights
Decorating the tree

I also have planned for us to do a Gratitude Tree that I found out about on Pinterest.  I will have it ready for us on December 1st and each day we will each grab a pre-cut circle and write one thing or two or three that we are thankful for.  In my album when the month is over, I will put all of our little thankful tidbits in a protective sleeve in the back.

Here are a few specific products I am picking up as well.


I know there will be several more I will add to my supplies for making my album ultra special but, so far this is it.  Besides the little bits of stuff I have from 2009.  

I plan to photograph the process as much as possible and share my journey with you on my blog along the way.  

If you haven't heard of the December Daily project and are interested, here are some great links to provide you with more information.
HERE is a link to all the posts in the December Daily category on Ali Edwards blog.  You can literally spend hours and hours there.
HERE is a link to the Flickr group that Ali has started for the December Daily 2011.
And HERE is just a Google search I did of December Daily and just look at all the inspiration it pulls up!
And finally HERE is a link to Ali Edwards site where you can find a ton of inspiration, I mean this girl ROCKS!

So, what do you think?  Are you inspired?  Will you be joining me in a December Daily project this year?  Remember - it is YOUR story so you can tell it how you want to whether it is simplistic or more elaborate.  If you will be doing one, I would love to follow your process too!

Look for more posts soon with updates on my album and our December activities!

Until next time.....HUGS!

Monday, October 24, 2011

I'm Designing Again!

Sorry it's been awhile since I posted.  I had a super busy week last week and then my wee Grandson and my daughter came and stayed with us for the weekend.  When that happens, I always drop everything and focus my total attention on them.  I only get to see them about every 6 weeks so it is imperative that I soak up every minute!  ;)

Here are just a few shots from their visit:
EGGS FOR BREAKFAST - YUM

WATCHING RATATOUILLE WITH POPS

B AND MEGAN - GORGEOUS!

I also wanted to share on here that I have started designing again.  I had retired back in January of this year due to some major medical issues I had going on.  However, I am all well now and itching to get back into creating templates so I can help scrap bookers preserve their memories.  I promise not to advertise my design business on here much as this blog is really for the "personal" side of me.  But, I had to give a shout out just to let you all know that I'm back at it!  I am not selling at a store yet.  I am just letting the chips fall where they may and see if something comes up.  So, in the meantime I am just going to be creating some FREEBIES!  I have one available today on my Facebook Fan Page HERE.  All you have to do is LIKE my page.


Also, here is my site address http://jeanyelabaya.com so you can bookmark my site to come back to in the future and while you are there, make sure you sign up for my newsletter!

I will be giving out 3 more freebies this week so keep an eye on my Facebook page or Twitter so you know when they come available.
Monday the 24th - Facebook Freebie (Serendipity One)
Tuesday the 25th - Blog Freebie (Serendipity Two)
Wednesday the 26th - Newsletter Freebie (Serendipity Three)
Thursday the 27th - Twitter Freebie (Serendipity Four + Word Art)

And just in case you ever forget where to find my designs, I put a button in my sidebar!  ;)

Whew.....okay now that I'm done pimpin' myself, I have a few layouts I have done the past week or so to share with you!

Friends
Truly Blessed by Captivated Visions and Laura Banasiak
Gimme Layers Vol 17 by Cluster Queen Creations

Welcome to the Air Force
Courageous by Libby Pritchett
Double It Up 8 by Cindy Schneider

Breakfast For Dinner
Sunnyside Up and Sunnyside Up Word Bit by Chelle's Creations
A Life Expressed {Mega Alpha Stash} by Suzy Q Scraps

With that I am going to sign off for tonight.  I have been in front of my computer for 14 hours today and I think I need to settle down and watch a movie.

I'll be back soon to talk about my 2 new projects that I am starting soon!

Hugs, NeeNee


Monday, October 17, 2011

Pinterest, Poppers and Pretzels

I admit it.  I had been in the closet about Pinterest until about 2 weeks ago.  I had heard and read things about it around the net but really never wanted to go check it out because in all honesty.....the last thing I needed was a new addiction that keeps me from getting other more important stuff done.  However, in a moment of weakness I clicked on someone's link to their Pinterest boards and within minutes I could feel myself getting sucked in.  I love inspiration.  Colors, beautiful places, recipes, home decor ideas and quotes, just to name a few.  I really haven't pinned a whole lot since joining as I only check in every few days and only peruse for 30 minutes or so at a time.  I am trying to be controlled about this so it doesn't get out of hand.  ;)

I have pinned several recipes that look and sound delicious!  Since today was grocery shopping day, I picked out a few recipes for us to try this week.  Well, I was so excited that I made them both tonight!  LOL

With this being my FIRST ever Pinterest projects, I knew I had to capture the memory and photograph my steps along the way.  I don't promise that you won't do some drooling along the way.  I apologize in advance for some of my photos, there is no window in my kitchen and I have dark counters, dark cabinets and black appliances so the photos can be a bit dark.

First up is some Jalapeno Bacon Cream Cheese Poppers.  Last night after seeing these on a friend's board, I knew I had to make them for us to try.
You can find them on my Recipes Board HERE where you can link to the original recipe by From The Aisle To Aloha.

You need the following ingredients:

1 tube of Crescent Rolls (I used the regular size, not the BIG ones)
2 fresh jalapenos
4 oz. block of cream cheese
1/2 pkg. of bacon


My way of making them yielded 12 poppers.

Preheat your oven to 350 degrees.

In the original recipe it says to cut your bacon in small pieces for frying.  Have you ever tried to slice bacon?  Not easy to slice those slippery strips so I've always used a little trick for cutting my bacon....SCISSORS!  I cut up half the package and then fried it up.


While your bacon is frying, cut the stems off of your jalapenos and then cut them lengthwise.  Remove the seeds and veins and then slice each half again lengthwise.  Then cut them width wise to yield pieces about 1/2" to 3/4".  


Next you can unroll your crescent rolls.  Once unrolled, I broke them into sections so that just 2 triangles were attached.  I then sliced them at an angle to yield 2 normal size pieces and 2 pieces that were smaller (the tips).


I then took those tips and pressed them together to make one piece.  So every 2 triangles wound up yielding me 3 crescent bases. 


Make sure to keep an eye on that bacon!  I got so busy doing my rolls and jalapenos (okay, so I was taking pictures too!) that I got my bacon a little too crispy.  Errr....burnt.  :)

Here are all of my ingredients ready to start assembling the poppers.


I laid all of my crescent pieces out on my rectangular cookie sheet and then added a dollop (about 1/2 tbsp.) of cream cheese to each one.  I then added about 3 or 4 chunks of cooked bacon and 2 to 3  pieces of jalapeno.


Once they are all topped, bring each corner up to the top and give it a little pinch or twist.  


Next just seal up the sides to keep your cream cheese yumminess from running out the sides when it heats up.    Then pop them in the oven for 10 to 15 minutes until golden brown.  


I got a little distracted again this time shopping at Lauren Grier's $1 sale and let mine stay in the oven a bit too long.  I never seem to make anything right when I try a recipe for the first time.  Practice makes perfect!

But, they were a big hit with the family!  I will definitely be making them again!

After dinner, we got together as a family to quickly make these Candy Corn Kissed Pretzels.  I knew these were going to be something we would all love and eat too much of.  Combine that with how incredibly simple they are to make and you can't go wrong!

You can find these on my Recipes Board HERE where you can link to the original recipe by Free Cake Info.

You will need the following ingredients:

Bag of Candy Corn
Bag of Pretzels - I used Snyder's Snaps cuz I love the butteryness of them!
Bag of white chocolate/milk chocolate kisses
Bag of almonds (optional)


The original recipe calls for just candy corn's but my hubby suggested we try them with an almond on the top too.  I thought it was a good idea so we tried ours half and half.

Preheat oven to 350 degrees.

Arrange your pretzels on a rectangular cookie sheet.  I was able to fit 70 pretzel snacks comfortably on my cookie sheet.  10 rows of 7 in each row.

Unwrap your kisses and place one on top of each pretzel.


Place in the oven for 3 to 5 minutes just so that your kisses get a little melted.  They turn shiny when they are warm enough.

Remove your cookie sheet from the oven and place a candy corn or almond on the top middle of each kiss.  Some of ours slid a little to the side but no worries, they all taste the same when you pop 'em in your mouth!


I popped our tray in the freezer for about 5 minutes to harden them up a bit so we could try them right away, we were anxious!  


After the taste test, Hubby and I both agree that the almond topped ones were the best.  We thought the kiss added just the right amount of sweetness and the candy corn made them a little sweeter than we like.  However, they are still really good with the candy corn, we just probably can't eat as many at a time.  Not that that is a bad thing, right?  And....admittedly the candy corn ones are more festive!

It was such a fun night and it got my family involved which I am all for!  We had some good laughs while prepping these recipes.  Laughter and food go so well together!

Let me know if you decide to try either of these.  I would love to know how they turned out and what you and your family thought of them.

I am out of here for now.  Ready to relax and take in some boob tube.  Until next time, HUGS!